Keyshot 2 Review

- CAD
- car renders
- decal
- decal management
- Embody 3D
- industrial design
- industrial designers
- Keyshot
- leap of faith
- Martin Gibson
- Maxwell Render
- Maxwell Render's MXM Gallery
- model
- multi-core and hyper-threaded systems
- multicore processor
- online user-upload material website
- parallel architecture
- post processing time
- Pro Engineer
- rendering times
- significnat headache
- tab
- User
- way
Article by Martin Gibson – Twitter: @martingibson @embody3d – 10.06.2010
Wait What on Earth is Keyshot 2?
Keyshot 2 is a rendering program that can be used in conjunction with CAD programs like Solidworks, Rhino, Solid Edge, Modo, Maya and the list goes on, you can pretty much import any file that you require. Keyshot is built for 32 and 64 bit Windows and also has a MAC version using cocoa so it runs fast baby! For more information you can always check out the Keyshot website: http://www.keyshot.com/keyshot/
What’s New and Improved in Keyshot 2
In a previous post ‘What is the Best Rendering Program for Solidworks?’ I gave Keyshot 1.9 a delightful review. It’s good quality render results, fast rendering times and best of all, instantaneous and extremely accurate previews of the final render before you take the render leap of faith was spectacular. However, Keyshot 1.9 wasn’t perfect, its decal management wasn’t great (for starters you couldn’t even apply more than one decal per a component!). Also you couldn’t do simple but necessary things like adjust the perspective of the render. But in Keyshot 2 these issues are resolved and there are some other great things going on in Keyshot 2, and simply put, Keyshot 2 I believe is a cut above all other rendering programs in many areas important to industrial designers.
Render Quality
The render quality in version 1.9 was good and after my initial testing the results in version 2.0 aren’t noticeably better. However if you happen to be fortunate enough to have a multicore processor you will find renders will be substantially faster due to a new parallel architecture to support multi-core and hyper-threaded systems.
User Interface
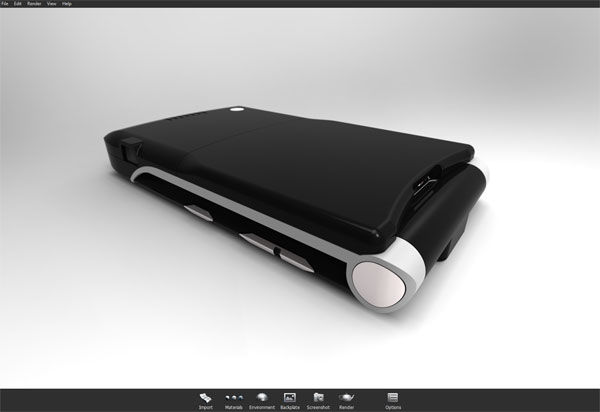
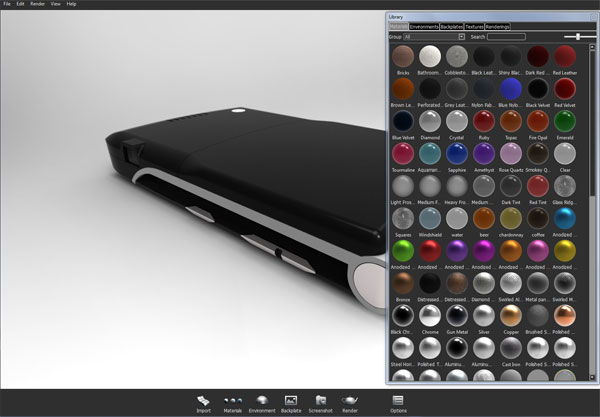
The user interface is aesthetically more modern, cleaner and more intuitive than the previous version. The user interface is more logical as well,by having a tab system with labels like:
- Import – import your file into the program
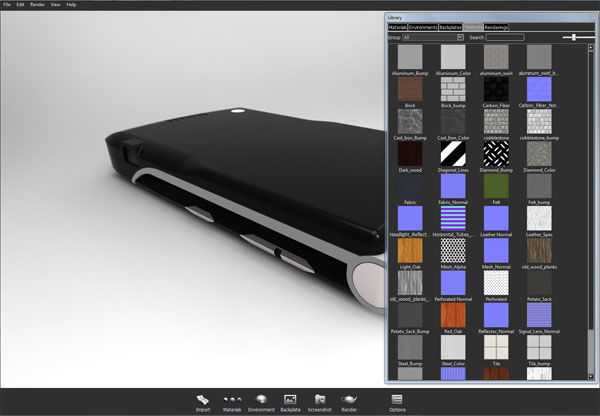
- Materials – apply materials to different components
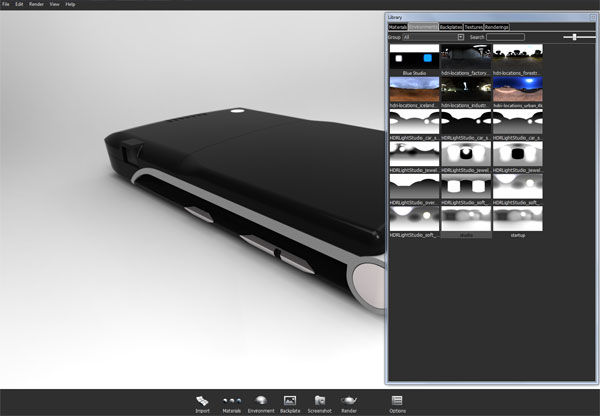
- Environment – change environment lighting (HDR)
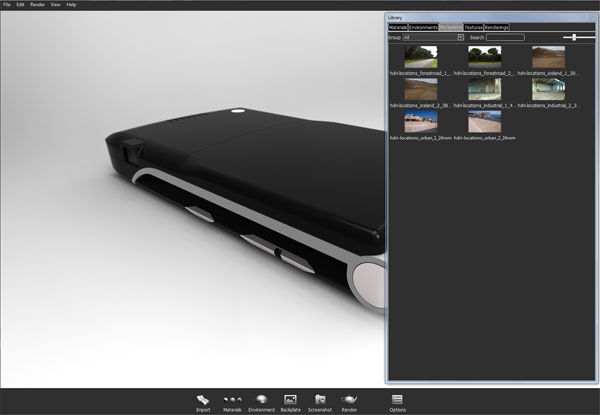
- Backplate – change the background image or colour (optional)
- Screenshot – takes a screenshot of the live render preview incase you are in a rush
- Render – performs a render
- Settings – adjusts settings like camera settings and preview quality etc.
This tab system from left to right makes it a real simple step by step process to get to your finished render, which is fantastic for beginners. Like step 1. import, step 2. apply materials, and so on. I get quite frustrated when a rendering program is just a screen full of settings or they are in no particular order, I always freak out that I have missed some tiny setting somewhere. This interface could still be made even better, for example, by grouping the render and screenshot tabs together in a different section of the interface would show a distinction between settings you must apply vs output buttons, this would be beneficial.
Applying materials is great as you can drag and hover a material over the top of a part and it will give you a live preview of what that part will look like in that colour even before you drop it! This is actually way more useful than you may think and trust me you will use it everytime you apply a material from now on.
Decals, Whoops I Mean Labels
Decal management is way better in version 2.0. The quick flip label horizontal or vertical option is a huge time saver from the previous version which would sometimes map your textures the wrong way around, which meant you had to go back into photoshop flip your image to the desired orientation and then add in the new decal ahhhr frustration! You can now put more than one decal or as Keyshot now calls it ‘label’ on a material.
Keyshot 2 is particularly fantastic if you’re applying a decal to a complex curved shape. There are a number of new mapping options that make applying decals seamless especially when you have the ability to choose where you want the centre of the decal to be with just a simple mouse click on your model…wa-la! Some of the new mapping options include: UV coordinates, box map, cylinder map, spherical map and so on.
It’s All About The Little Things!
There are significnat headache savers in the settings tab, these include being able to rotate and scale the model within keyshot! There was nothing that drove me more insane with version 1.9 than when you imported a CAD file and having it positioned upside down or sideways on the normal axis, and there was no way to rotate it…so frustrating!!! This meant you had to go back into your CAD program tweak what plane the model was on and then reopen it again! This is now thankfully resolved. Also you can choose certain components of your model assembly that you may want to hide for the render using a simple checkbox system.
Another great option in the settings tab which is similar to Photoview 360/Modo is the ability to change the brightness and gamma of the environment. This definately saves heaps of post processing time in Photoshop . With Keyshot’s Live Render Preview you instantly see this brightness/gamma change so you can get it just right. Also generally speaking all the settings have these nice new toggle controls, rather than number input controls which mkes applying and previewing settings seem so much more natural.
When importing a CAD file the options have been improved. So you can now import by colour, keep all components as individual parts rather than merging identical components and you can even retain some colour properties of the model if they have been applied by some CAD programs. Oh yeah and did I mention you can now finally adjust the camera perspective eureka! Now I can get my car renders looking sexier than ever before.
Plugins for CAD Packages
Also new to Keyshot 2 are some plugins for popular CAD programs like Solidworks, Rhino and Pro Engineer. But after testing the plugin for Solidworks it is basically a huge waste of time of a plugin. It is pretty much a new tab in Solidworks which just says “render” and that’s all you can do and it will then just launch Keyshot as normal anyway. I don’t even think it is worth the effort of the Keyshot development team to pursue these plugin enhancements, the program works perfectly fine as its own entity.
Emissive Materials
Finally materials that can emit light have been introduced in the latest version. Emitters can be applied on any existing material however there are no preset materials which is a tad annoying, even if it were just some stock neons or area lights. Lights don’t render fantastically on Keyshot, and the detailing of the indirect illumination isn’t as accurate as it could be. But this is another way in which Keyshot is at least on par with the other rendering programs. The next step would be having even greater controls of how the light behaves. You are able to tweak the intensity of the light, but what about the dispersiveness and direction of the light?
Disadvantages/Future Improvements
The materials are good, but there are no real new additions, there definately needs to be more exotic materials, like woods, grass etc…(you know those materials that you say you will never use, but one day…you know the day you actually need that material you will be begging that it was in there. You can edit materials by double clicking on a particular component, but it would be nicer to have more presets. Creating custom materials and editing existing materials could be improved by having a wizard like system. Keyshot 2 could certainly use an online user-upload material website, where you can download other peoples created materials, like Maxwell Render’s MXM Gallery.
Talking about materials it would be nice to be able create 3d materials like Maxwell render. You can apply textures to materials in Keyshot, but you are unable to create materials of any substantial 3D depth like Cinema 4d or Maxwell Render can. This would be great for things like grass blades, fur, fabrics etc.
Another complaint I have always had with Keyshot is that if you crank the quality settings up on high the actual render looks barely any better than if you keep the settings on low. There is nothing more frustrating than waiting an hour or more for render to be complete, and then doing another render with all the settings on low which may take a minute to complete and then to come to the discovery that there are only very minute changes noticeable in the render results. If you want to allow me to render for several hours at least give me a reward with a better render, if you can’t do this, don’t even let me in the first place render on such high settings.
The general quality needs to be enhanced to a more realistic level, it still doesn’t have the same feel as the main professional photo-render programs. I don’t how to explain it but the renders in Keyshot kind of say “hey I was designed and modelled in a CAD program” whereas Maxwell and V ray say “hey I am actually a photo”. I think it has to do with the camera settings on Keyshot, but I must say the depth of field on Keyshot is second to none, and the renders come out really clean there is absolutely no ambiguity. But they miss this certain tone about them, it is like they are a bit too plasticy or look too fabricated; the key to realism is in the small details like shadows and lighting quality.
Some Sample Screenshots
Here are some screenshots I did while I was testing out a CAD model of the Motorola Razor Phone showing the materials, environment and live preview screen. Notice how real the live render looks!
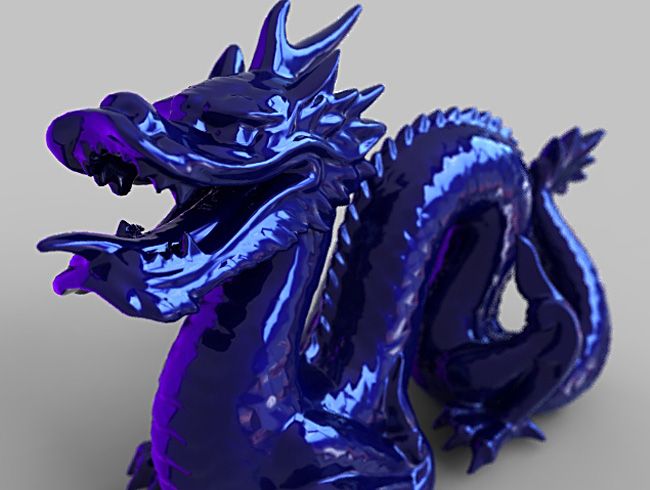
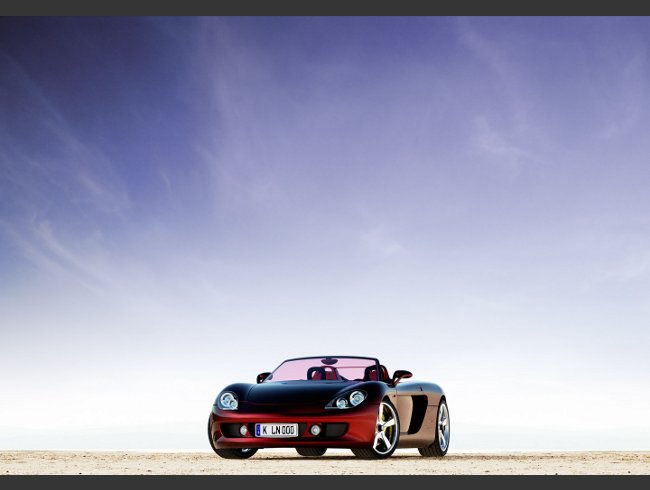
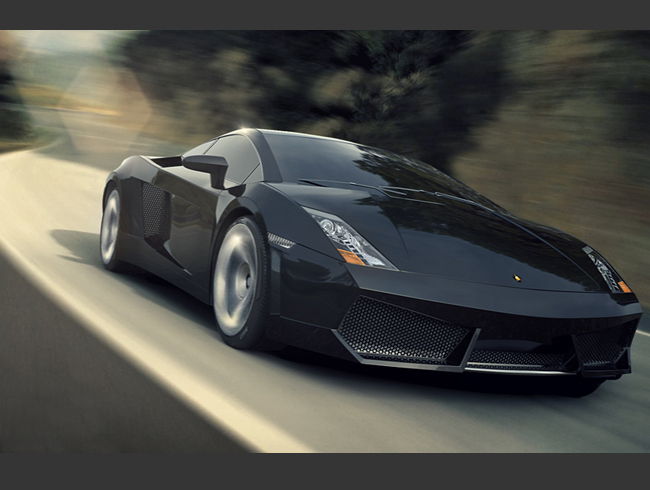
Some Sample Renders
Renders courtesy of Keyshot.
Going Forward
To sum up Keyshot 2, I would have to say brilliant. Although the features are things that perhaps could have been done in version 1.9 they are most welcome and every existing or new customer of Keyshot will reek the benefits. Definitely check it out.





2 Comments
[…] This post was mentioned on Twitter by Embody 3D and Martin Gibson, Martin Gibson. Martin Gibson said: Keyshot 2 #Review http://goo.gl/fb/gd9pi #featured […]
Great Review! I found it really helpful. Thanks!